Creating a web site with Spring Boot, Spring Framework, Hibernate ORM and Thymeleaf
When i have first started writing this blog, i have also written a post to explan how to create a website like this using spring boot MVC. You can check out that post here but that post is sort of obsolete now. Therefore i have written how to create a website like this with up-to-date spring MVC and Thymeleaf infrastructure. New and improved :D
The content of the post is going to be almost the same as the old post. But i have also added some new features too. If you follow this blog post, you will be able to create a demo blog website yourself. Then you can add your own pages and configurations on top of it. Let's go step by step.
#1. Blueprint of the project (Spring Boot)
Spring Framework is widely used nowadays and it is bascially changing the way we create software. It is also accelerating development when used with Spring Boot infrastructure. First thing we need is going to be a Spring Boot application. You can create a template like i showed in the image below by visiting Spring Initilizr website.
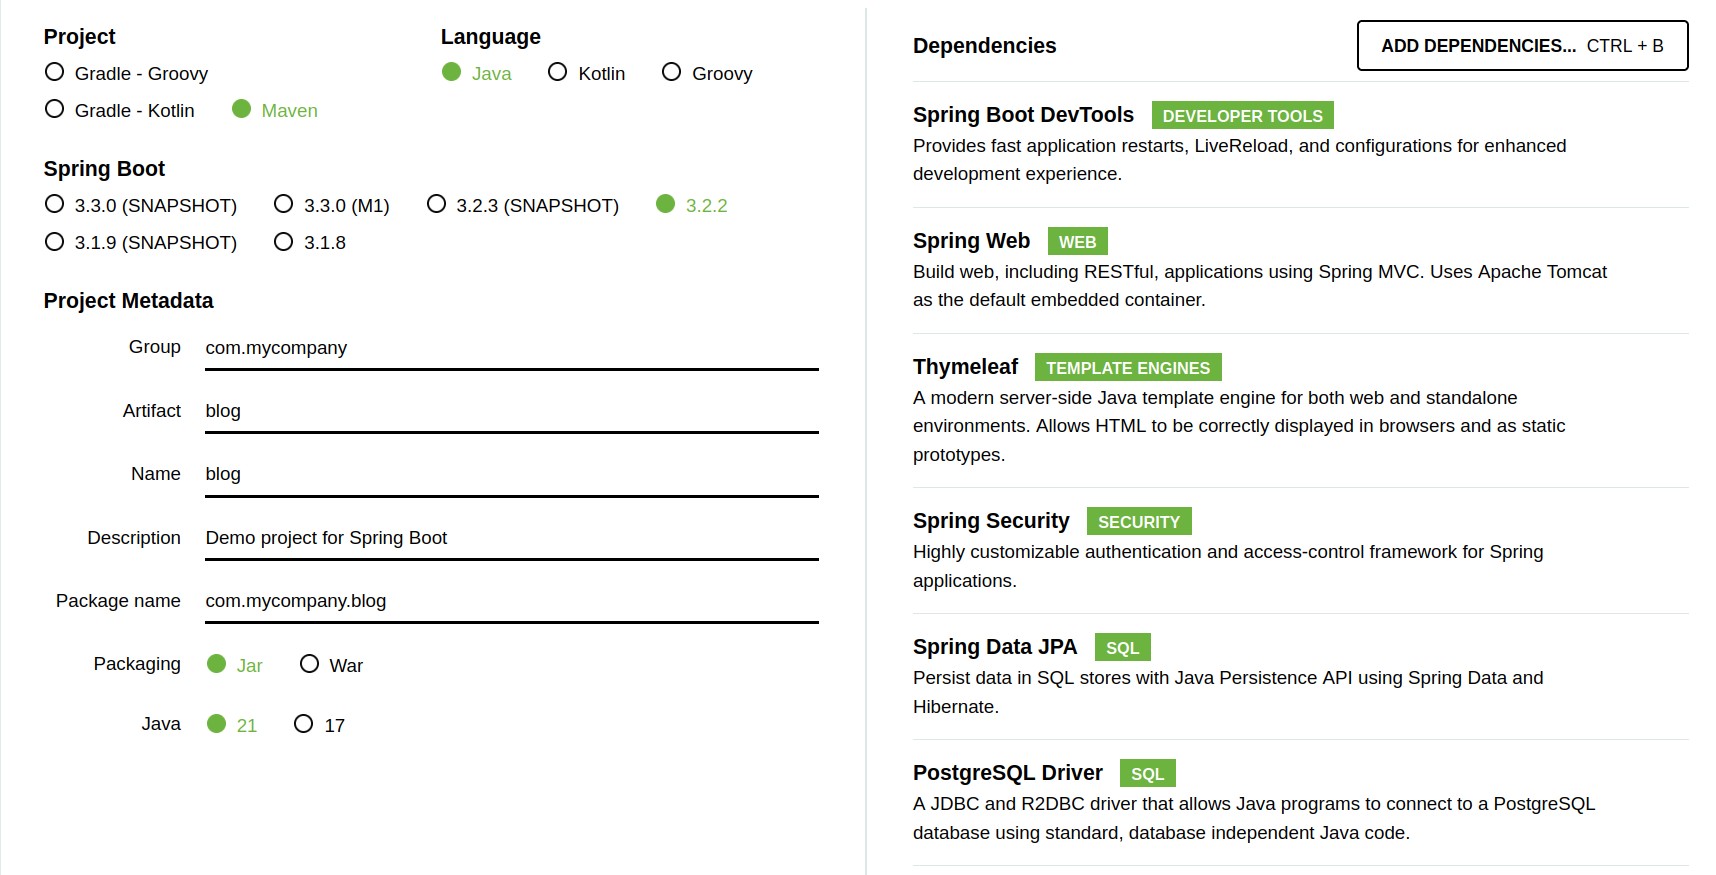
The left side of the screen contains the necessary information for Maven, which is one of the complimentary technologies. Maven will form your project and source code and compile it in a package with these information. The packaging of your project can be "jar" file since spring boot will provide a main method and a built-in apache tomcat server inside.
#2. Dependencies
Our first dependency devtools will deploy your application on the built-in server, as soon as you save your code. This way you will not have to stop-start the application everytime you change the code. When you choode Run as -> Spring Boot Application, your website will be deployed and start serving from http://localhost:8080.
The next one, Spring Web will give the necessary libraries to run as a web project. It will include an apache tomcat server inside and will run the website here. This way, you won't have to create a server manually and choose Run as -> Run on server. Instead you will be running as Spring Boot application. Spring boot will handle these operations, all the while making you ever more lazy. :)
Thymeleaf is basicaly a tag library where you can take advantage of MVC design pattern. This will enable you to convert the information into html output with spefific code structures. For example, when you use th:each command, the interpreter will turn it into a for loop and multply the element in the html page. It works very well with spring framework too. More on this is here.
The next dependency, Spring Security, is the access control library. It handles operations like password protections or cross site script attacks. You will probably use it to secure your admin pages for the website later.
Spring data JPA will help you query your database with java codes rather than native sql queries. It will also boost your development process and make it easier to maintain, by allowing you to create and operate on your entities inside your code. To put it simply, less sql, more java.
PostgreSQL Driver can be replaced by other database vendors like MySql, Oracle, MSSQL. This is the database driver (connection agent) and postgresql is just an example. You can choose any datebase you want. But you will inevitably use one of them.
#3. Backend is done but where is the frontend?
We will be taking advantage of Thymeleaf properties on the frontend. But if you can't design your own user interface with css and javascript or you are not familiar with technologies like react, angular, vue.js, you might have to start with an html template here. As long as you attribute the creator in your website with a link, you can find a number of free html bootsrap (css) templates to use. I found one in ColorLib. There are mostly wordpress templates but you can also find html + bootsrap templates too.
#4. The project is ready to be developed
After you find or create a theme and include it inside the templates folder, the project should look something like the image below. First Import Existing Maven Project in eclipse of course.
In eclipse, you should also install Spring Tools Suite from the marketplace too.
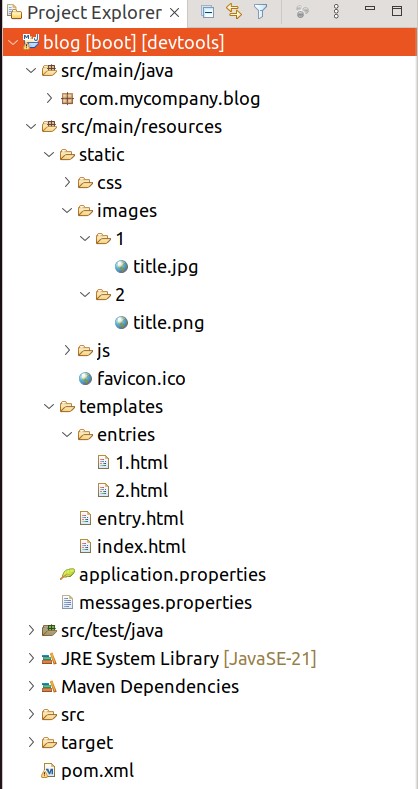
Resources folder will store your images, css files, javascript files inside the static folder. Thymeleaf and spring boot will be working with this structure. Templates folder will store your web pages. Notice Index.html and entry.html is here. application.properties will hold the environment variables for the whole application. Database connection strigs, usernames and passwords, logging levels and ..etc will be here. pom.xml at the bottom will be used by Maven when compiling your application and will also hold the necessary depenceny information.
This project is basicaly ready to launch with Run as -> Spring Boot Application at this stage but it will look for database configuration to connect a database while launching. An example for PostgreSQL database connection properties inside the application.properties would be like this:
server.shutdown=graceful
spring.datasource.username = postgres
spring.datasource.url = jdbc:postgresql://localhost:5432/blog
spring.datasource.password = somepassword
spring.jpa.hibernate.ddl-auto = update
spring.jpa.properties.hibernate.enable_lazy_load_no_trans = true
spring.jpa.properties.hibernate.current_session_context_class = org.springframework.orm.hibernate5.SpringSessionContext
spring.security.user.name = myadmin
spring.security.user.password = myadminpassword
spring.web.resources.cache.cachecontrol.max-age = 30d
spring.web.resources.cache.cachecontrol.no-cache = false
spring.web.resources.cache.cachecontrol.no-store = false
After writing the necessary information here, you can try to open http://localhost:8080/index.html in your browser, only to get a faceful of spring security in front of you. But you can pass this security layer by entering the spring.security.user.name and password properties in the application.properties file above. You may get a 404 error after this but it is ok now.
If you are creating a blog like this, you will probably use the security for admin pages only. In order to tell spring security to intervene only for the admin pages and let the users browse other pages freely, you should include a class like this inside your application.
@Configuration
public class SeConfig
{
	@Bean
	SecurityFilterChain securityFilterChain(HttpSecurity http) throws Exception
	{
		http.authorizeHttpRequests(custom -> custom.requestMatchers("/admin").authenticated());
		http.authorizeHttpRequests(custom -> custom.requestMatchers(PathRequest.toStaticResources().atCommonLocations()).permitAll());
		http.authorizeHttpRequests(custom -> custom.anyRequest().permitAll());
		return http.build();
	}
}
@Configuration means this class is a configuration file for spring boot. Shocker. For example, while the royal guard of spring security is awakening, spring boot will look for beans with this annotation. When you create SecurityFilterChain class, this will indicate that this is spring security filter chain.
This will establish the basic security settings for spring security. We can now move on to prepearing the data for index.html. First, let's define the hibernate entities (database tables). A simple entity example can be like this:
@Entity
@Table(name = "ENTRY")
public class Entry
{
	@Id
	@GeneratedValue(strategy = GenerationType.IDENTITY)
	@Column(name = "ID", nullable = false)
	private int id;

	@Column(name = "TITLE", nullable = false, length = 1500)
	private String title;

	@Column(name = "IMG_URL", nullable = false, length = 200)
	private String imgurl;

	@Column(name = "SUMMARY", nullable = false, length = 2000)
	private String summary;

	@ManyToOne
	@JoinColumn(name = "CAT", referencedColumnName = "ID", nullable = false)
	private Category category;

	@ManyToMany
	@JoinTable(name = "EntryTags", joinColumns = @JoinColumn(name = "entryId"), inverseJoinColumns = @JoinColumn(name = "tagId"))
	private List<Tag> tags;

	@Column(name = "PUB_DATE", nullable = false)
	private Date publishDate = new Date();

	// getters setters constructors...
}
@Entity will let the spring boot know that this class should be treated as an entity, not like person or animal or something. @Table annotation will indicate the database table name. This is the best practice. There are also joins here that i have added as clues for you. This database structure is completely up to you but i wanted to give n-1 Category, n-n Tag classes as example. There is no necessity to go further details here since you will probably have a different approach. But i thought there would be a category and many tags for a post.
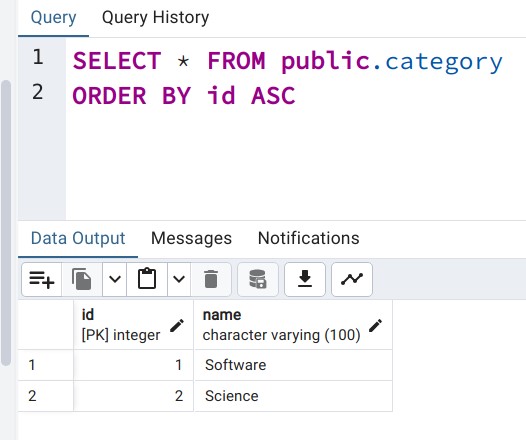
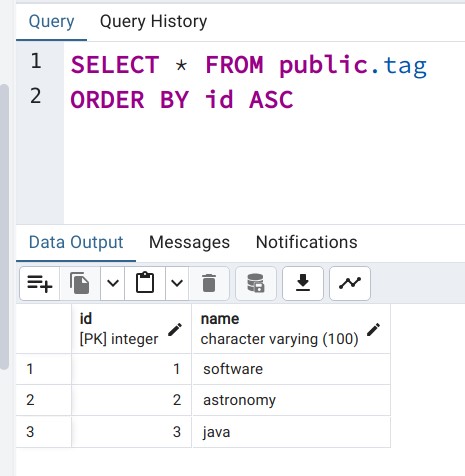
Then the Category adn Tag classes are here as tables or entities like this.
@Entity
@Table(name = "Category")
public class Category
{
	@Id
	@Column(name = "ID", nullable = false)
	@GeneratedValue(strategy = GenerationType.IDENTITY)
	private int id;

	@Column(name = "NAME", nullable = false, length = 100)
	private String name;

	// getters setters constructors...
}

@Entity
@Table(name = "TAG")
public class Tag
{
	@Id
	@GeneratedValue(strategy = GenerationType.IDENTITY)
	@Column(name = "ID", nullable = false)
	private int id;

	@Column(name = "NAME", nullable = false, length = 100)
	private String name;

	@ManyToMany(mappedBy = "tags")
	@OrderBy(value = "id desc")
	private List<Entry> entries;

	// getters setters constructors...
}
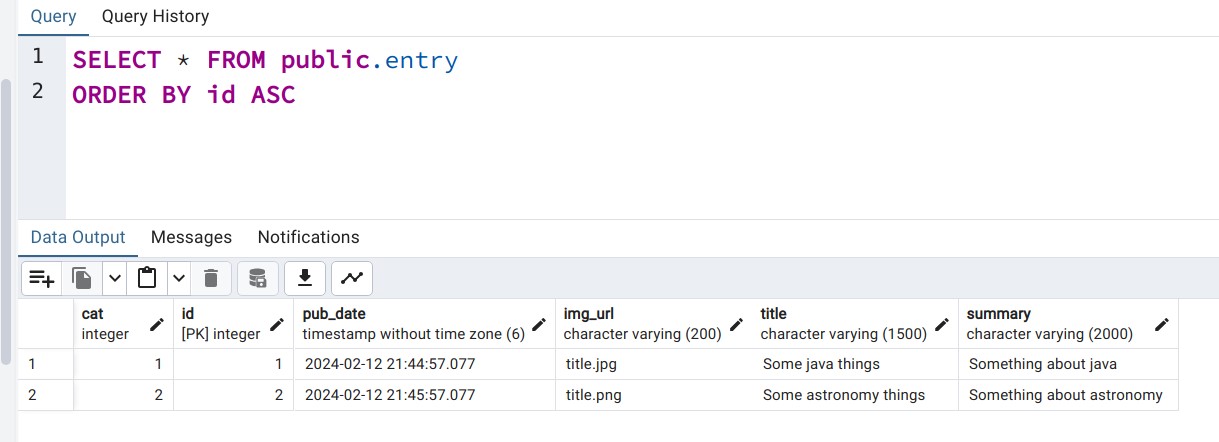
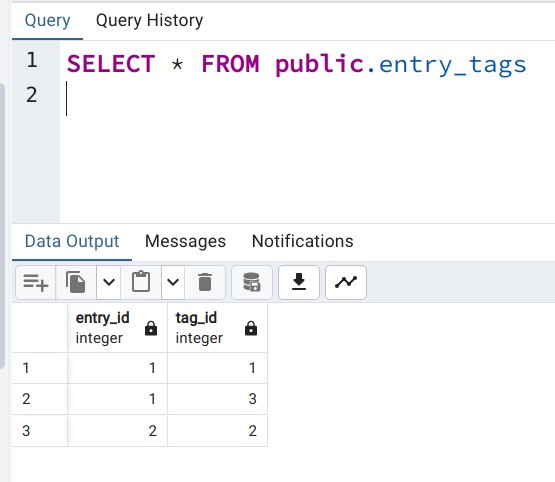
You will now write the database access class to manage these entities with CRUD operations. Let's jsut add the first 2 posts into the database like the images below. But first run the application once so that it configures your database. Before that you should make sure the create the "blog" database.
After creating the first demo data, we need a repository the reach this data. The simple repository below will be enough for our demo.
@Repository
public interface EntryRepository extends JpaRepository<Entry, Integer>, JpaSpecificationExecutor<Entry>
{
	// that's all :)
}
@Repository is a spring framework stereotype annotation just like @Component or @Service. @Repository is the go to annotation for database operation classes. With the help of JpaRepository, this example is selecting all the posts from entry table. Now you can actually try to go localhost:8080/index.html page but you will get a 404 error. You must provide a router here and you will be using controller classes of spring framework. There is also database queries here with our ready to use repository and entitiy classes. ModelAndView class will tell spring framework to prepare the index.html page (view) with the list of posts as extra information (model). Example:
@Controller
public class Maincontroller implements ErrorController
{
	private EntryRepository entryRepository;
	private List<Entry> all_entries;

	public Maincontroller(EntryRepository entryRepository)
	{
		this.entryRepository = entryRepository;
		this.all_entries = this.entryRepository.findAll(org.springframework.data.domain.Sort.by(org.springframework.data.domain.Sort.Order.desc("id")));
	}

	@GetMapping(path = { "", "/", "index" })
	public ModelAndView home()
	{
		ModelAndView modelAndView = new ModelAndView("index");
		modelAndView.addObject("entries", all_entries);
		return modelAndView;
	}

	@GetMapping(path = "entry")
	public ModelAndView entry(@RequestParam(name = "ent", required = true) Integer entry_id)
	{
		Entry entry = entryRepository.findById(entry_id).get();
		ModelAndView modelAndView = new ModelAndView("entry");
		modelAndView.addObject("entry", entry);
		modelAndView.addObject("content", "entries/" + entry_id + " :: " + entry_id + "");
		return modelAndView;
	}

	//	@GetMapping("/error")
	//	public String handleError(HttpServletRequest request)
	//	{
	//		Object status = request.getAttribute(RequestDispatcher.ERROR_STATUS_CODE);
	//		if (status != null)
	//		{
	//			Integer statusCode = Integer.valueOf(status.toString());
	//			if (statusCode == HttpStatus.NOT_FOUND.value())
	//			{
	//				return "error-404";
	//			}
	//			if (statusCode == HttpStatus.INTERNAL_SERVER_ERROR.value())
	//			{
	//				return "error-500";
	//			}
	//		}
	//		return "error-500";
	//	}
}
Spring boot will instantiate this class as a bean and use it to match web requests with views because it is annotated with @Controller annotation. We are using constructor injection for repository. @GetMapping is a web get request annotation that indicates this method will be responding to / or /index requests. The necessary back-end code for index.html and entry.html is ready at this stage.
The only step left to put these posts on the interface is to use thymeleaf specifications. You can use a structure like th:each on the frontend like this:
<!DOCTYPE html>
<html lang="en" xmlns:th="http://www.thymeleaf.org">
<head>
<title th:text="#{site.title}"></title>
<meta charset="utf-8">
<meta name="viewport" content="width=device-width, initial-scale=1, shrink-to-fit=no">
<meta name="description" th:content="#{site.description}">
<meta property="og:title" th:content="#{site.title}" />
<meta property="og:image" content="images/fav.png" />
<meta property="og:description" th:content="#{site.description}" />
<link rel="stylesheet" href="css/bootstrap.min.css">
</head>
<body>
	<div th:each="entry: ${entries}">
		<a th:href="@{'entry?ent=' + ${entry.id}}">
		<img th:src="@{'images/' + ${entry.id} + '/' + ${entry.imgurl}}" width="64" height="64">
		</a>
		<div>
			<h3>
				<a th:href="@{'entry?ent=' + ${entry.id}}" th:text="${entry.title}"></a>
			</h3>
			<div>
				<p>
					<span th:each="tag: ${entry.tags}">
						<a th:href="@{'tag?tag=' + ${tag.id}}">
							<text th:text="${tag.name}"></text>
						</a>
					</span>
				</p>
				<p>
					<span th:text="${#dates.format(entry.publishDate, 'dd MMMM yyyy')}">
					</span>
				</p>
			</div>
			<p th:text="${entry.summary}" />
			<p>
				<a th:href="@{'entry?ent=' + ${entry.id}}" th:text="#{site.read_more}"></a>
			</p>
		</div>
	</div>
	<script src="js/bootstrap.min.js"></script>
</body>
</html>
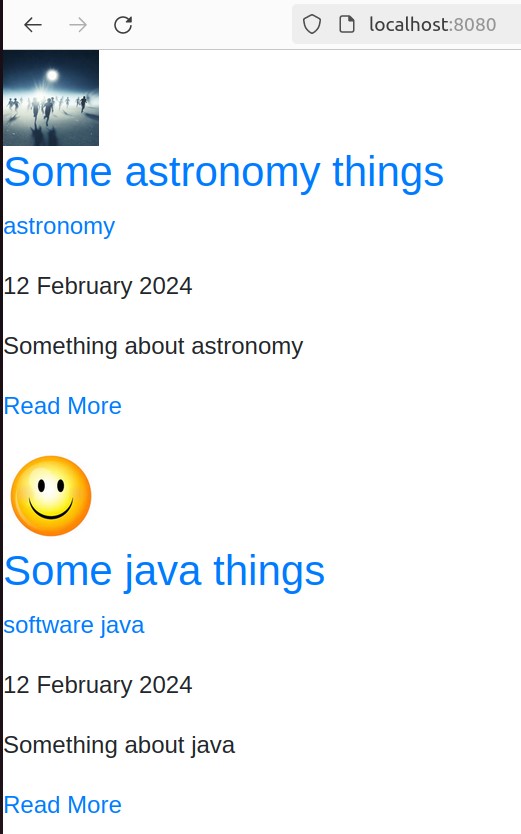
Of course these pages will be modified in the future. I have created a sample easy to understand starting point here and listed the posts. When you visit localhost:8080/index now you will see a horrible page like the one below.
We also need a page to show the entry content in the /entry url. I have replaced a div with thymeleaf here to make it dynamically include a post in this page. You don't have to do this, you can fetch the posts from database if you want. I wanted to content to be inside the jar file and created this structure. Also notice the images and entries folders inside the project here. You can have different titles or images for each post. My sample entry page is down below:
<!DOCTYPE html>
<html lang="en" xmlns:th="http://www.thymeleaf.org">
<head>
<title th:text="${entry.title}"></title>
<meta charset="utf-8">
<meta name="viewport" content="width=device-width, initial-scale=1, shrink-to-fit=no">
<meta name="description" th:content="${entry.summary}">
<meta name="author" content="Numan Karaaslan">
<meta property="og:type" content="article" />
<meta property="og:title" th:content="${entry.title}" />
<meta property="og:image" itemprop="image" th:content="@{'images/' + ${entry.imgurl}}" />
<meta property="og:description" th:content="${entry.summary}" />
<meta property="og:url" th:content="@{'http://www.numankaraaslan.com/entry?ent=' + ${entry.id}}" />
<link rel="stylesheet" href="css/bootstrap.min.css">
</head>
<body>
	<div th:replace="~{entries/1 :: 1}"></div>
<!-- 	<div th:replace="${content}"></div> -->
	<div>
		<div>
			<span th:text="${#dates.format(entry.publishDate, 'dd MMMM yyyy')}"></span>
		</div>
		<div>
			<a th:href="@{'tag?tag=' + ${tag.id}}" th:each="tag: ${entry.tags}" th:text="${tag.name}"></a>
		</div>
	</div>
	<script src="js/bootstrap.min.js"></script>
</body>
</html>
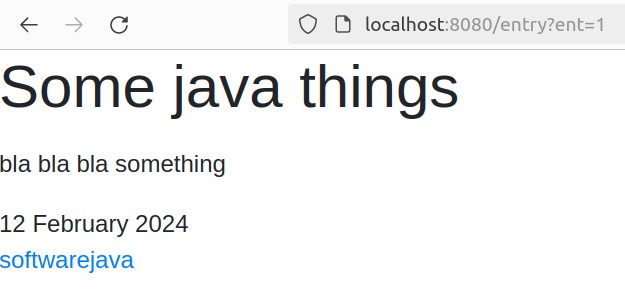
If there are no problems upon this point, you can see another horrible page like this for entries. Notice the tags are also there.
#5. I taught you how to fish rather than giving you the fish
The pages where you may list your blog posts and open them can be prepared with these couple of classes and code blocks. If you have completed the whole posti let me add the codes i have written here as a surprise, so that you can download them. You must continue your journey by configuring, managing and implementing your own requirements after this point. You can get these codes to work in only 1 day with some experience. If you already know what kind of website are you going to develop, you will mostly be using similar codes with spring, hibernate and thymeleaf. Your Controller class will eventually get bigger. The data you store in the database will evolve hence making complex repository classes. The purpose of this post is to give you the basics and guide you through the first baby steps. I wish you error-free coding and see you at the next post :)
Leave a comment